Setting Up A Lightning Simulation Network With Polar
Setting up a Lightning simulation network with Polar #
The Lightning Network is currently the most promising second layer technology that allows scaling on top of the Bitcoin blockchain. Lightning offers fast transactions with minimal fees, but it’s also an exiting new opportunity for new applications.
Prerequisits #
Before we get started, we’ll have to install Docker and Polar. Polar makes use of Docker to spin up containers with lightning and bitcoin nodes. Polar is an open-source software that allows the easiest set-up of a local simulation network for local development. Follow the links below and install the software on your system:
- Docker Desktop (on Linux: Docker Server & Docker Compose)
- Polar
Getting started with Polar #
Polar is a neat tool that allows us to spin up a network of lightning nodes on our machine. We can choose from the different lightning implementations: c-lightning, eclair and LND. Before we get started, we have to start the Docker Desktop application.
After starting the application, we can create our first network. We’ll select one lightning node for each of the three implementation and one Bitcoin core node.
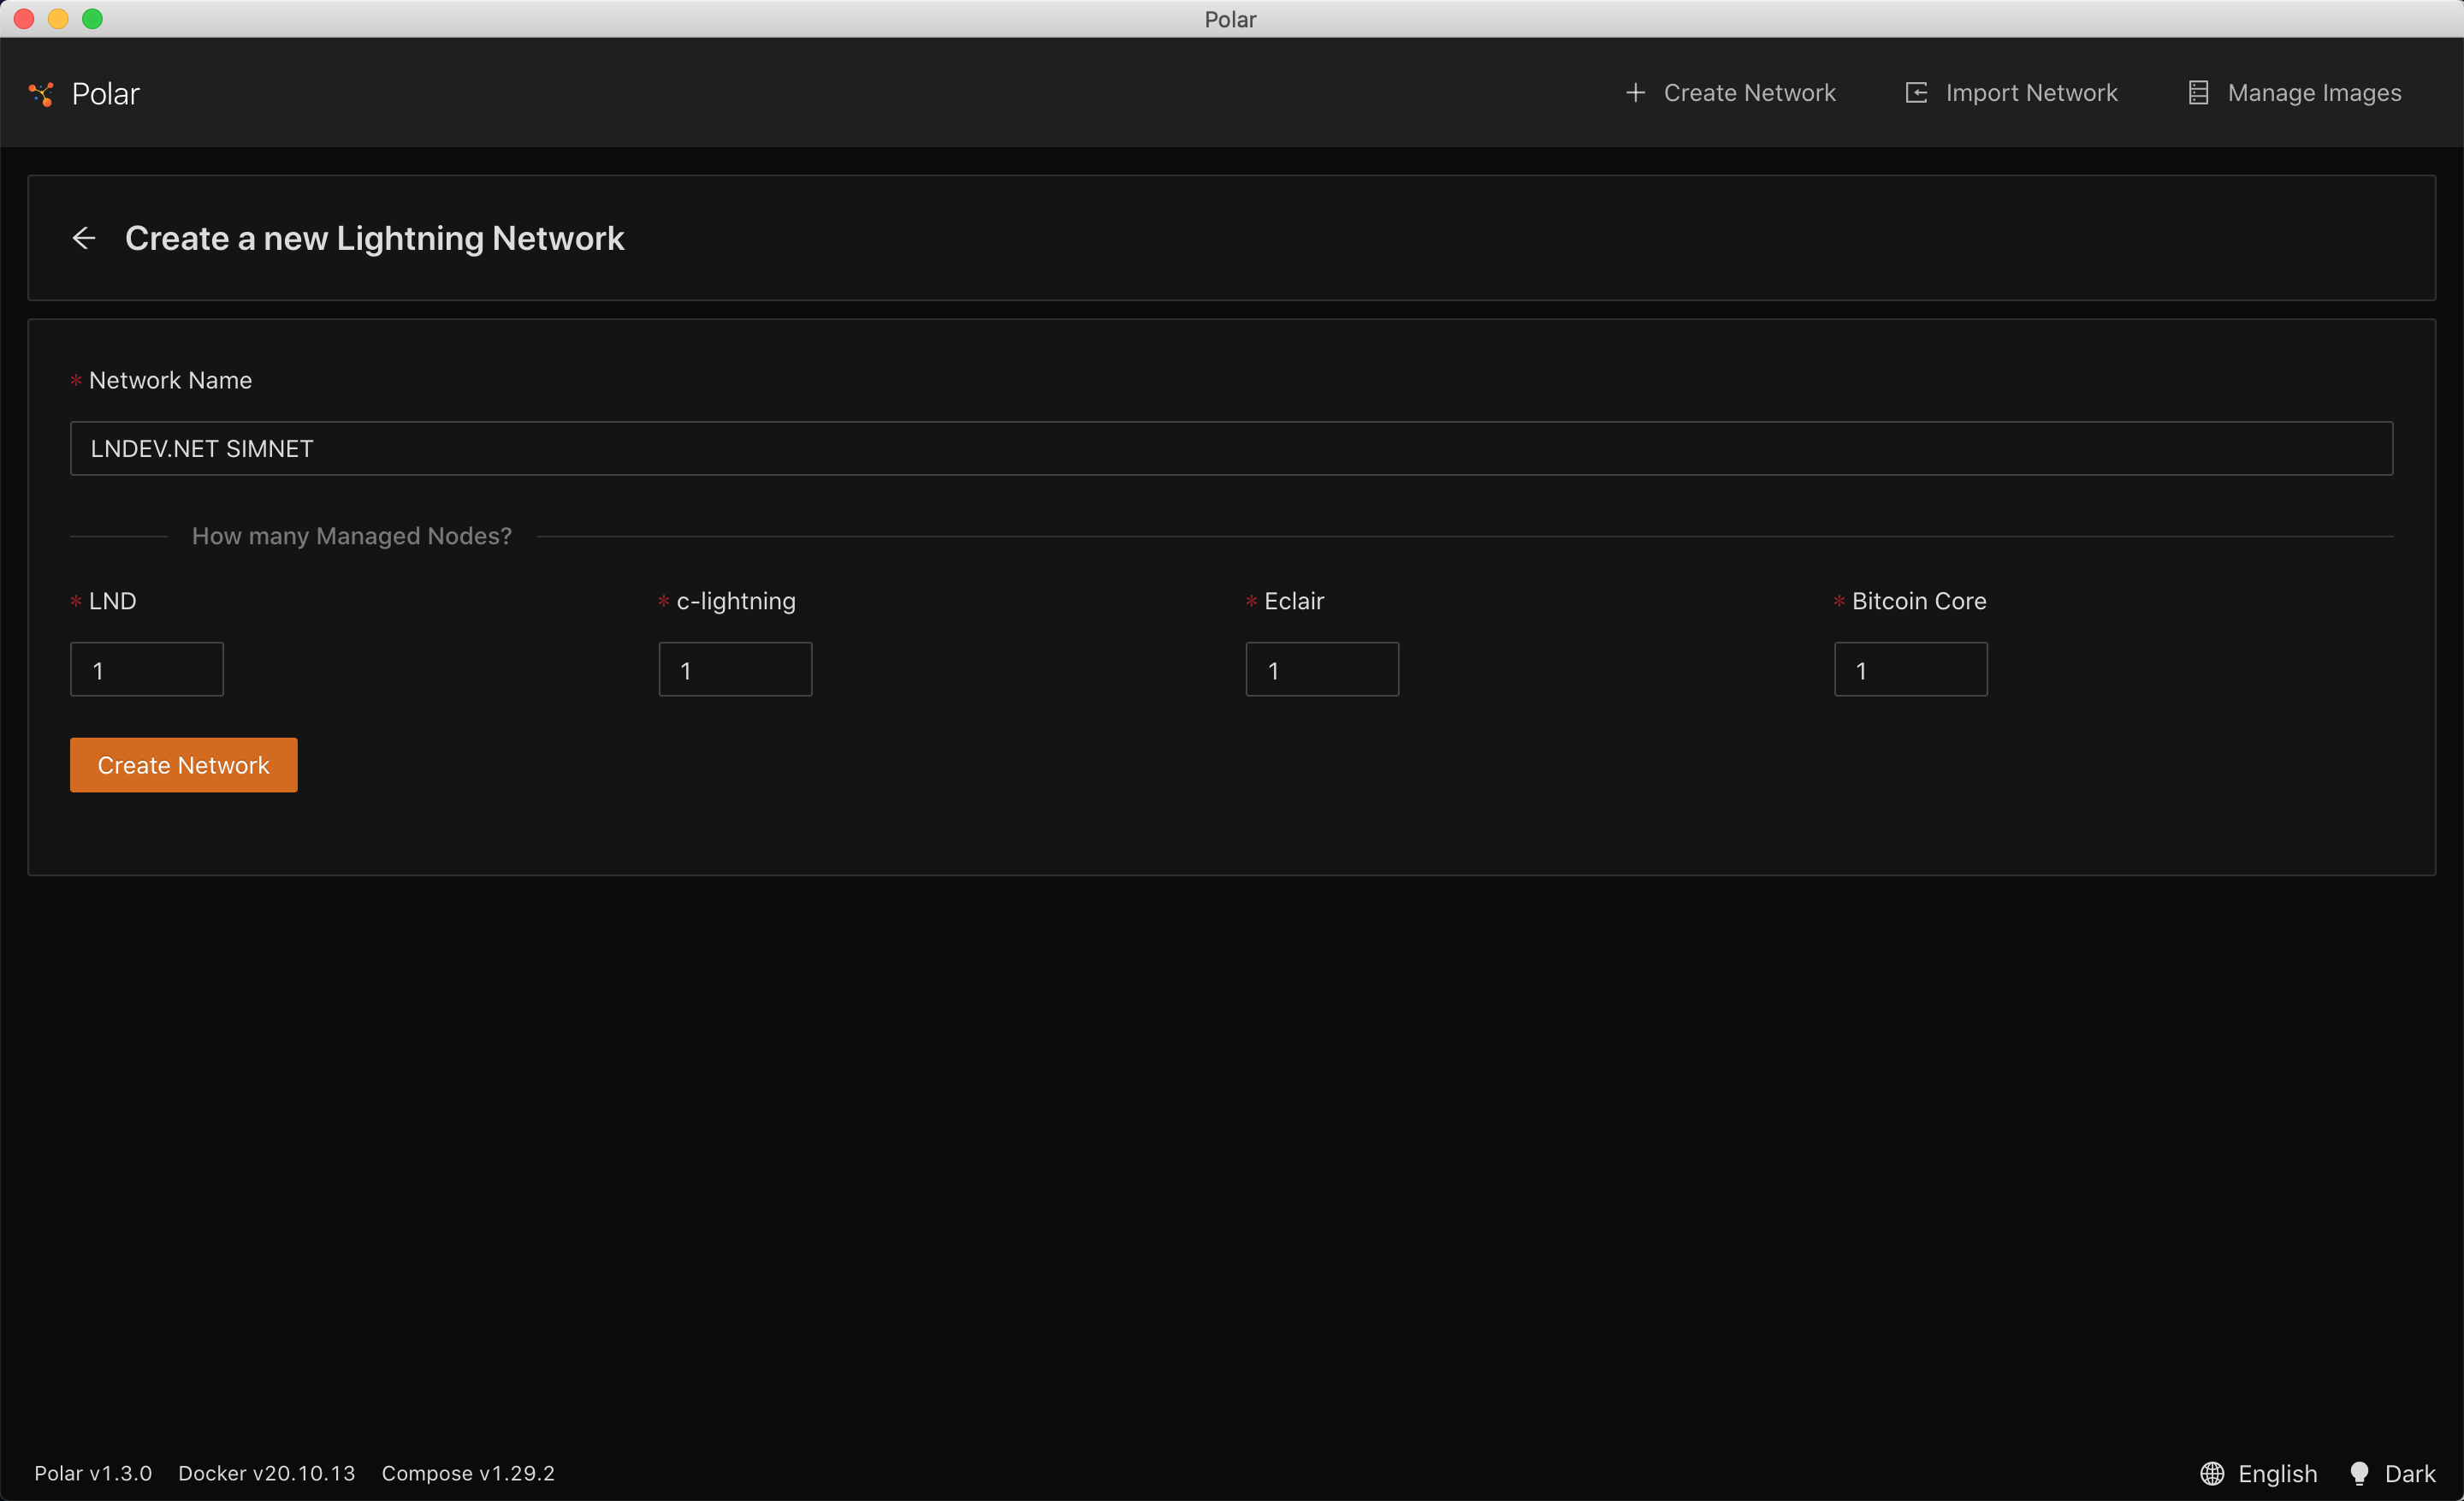
After creating the network, you will see the Network Designer, which allows you to drag and drop nodes onto the canvas. If you need to use a different version of a lightning node, you can toggle Show All Versions and drag it onto the canvas on the left side to add it to the network. On the top left you can start the network. This will take a bit longer when you do it for the first time, because Polar will have to download all the images first.
Mining the first blocks #
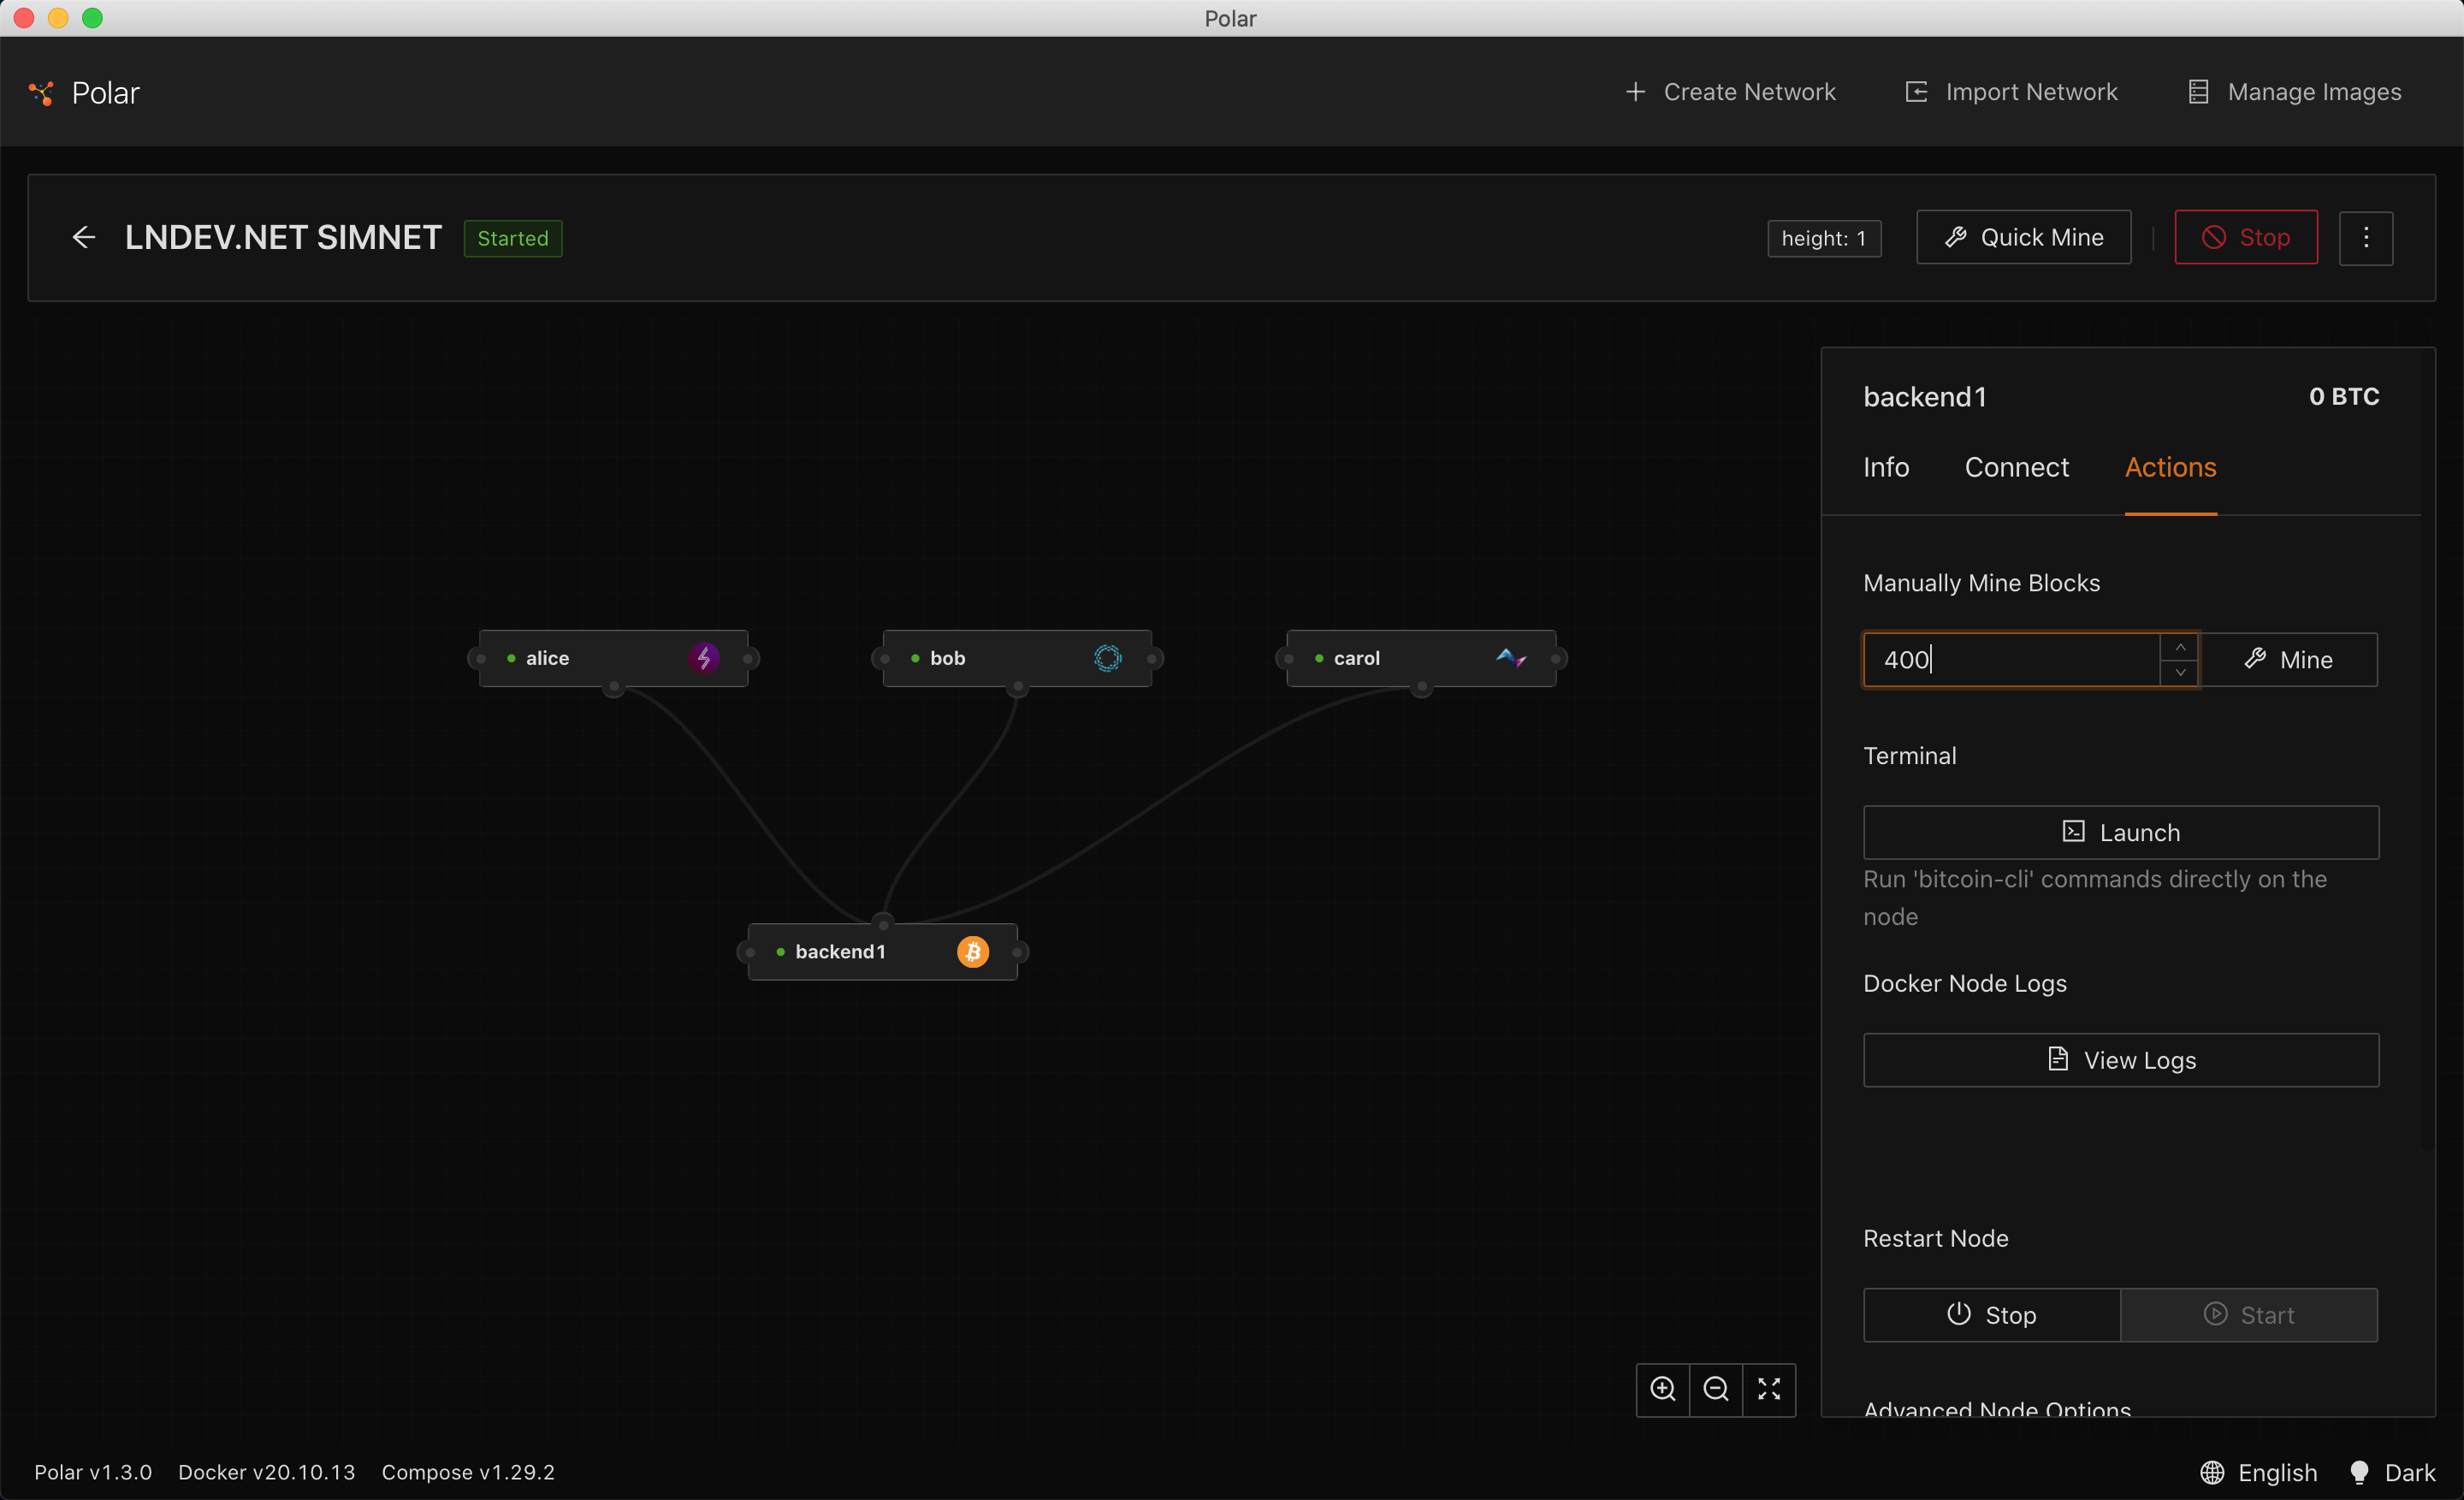
After we start the network, the blockchain is at block height 0, so we have to manually mine some blocks to create Bitcoin that can be sent around on our simulation network. We’ll go ahead and mine 400 blocks. Afterwards we’ll see that the bitcoin core node now has a spendable balance.
Creating a channel #
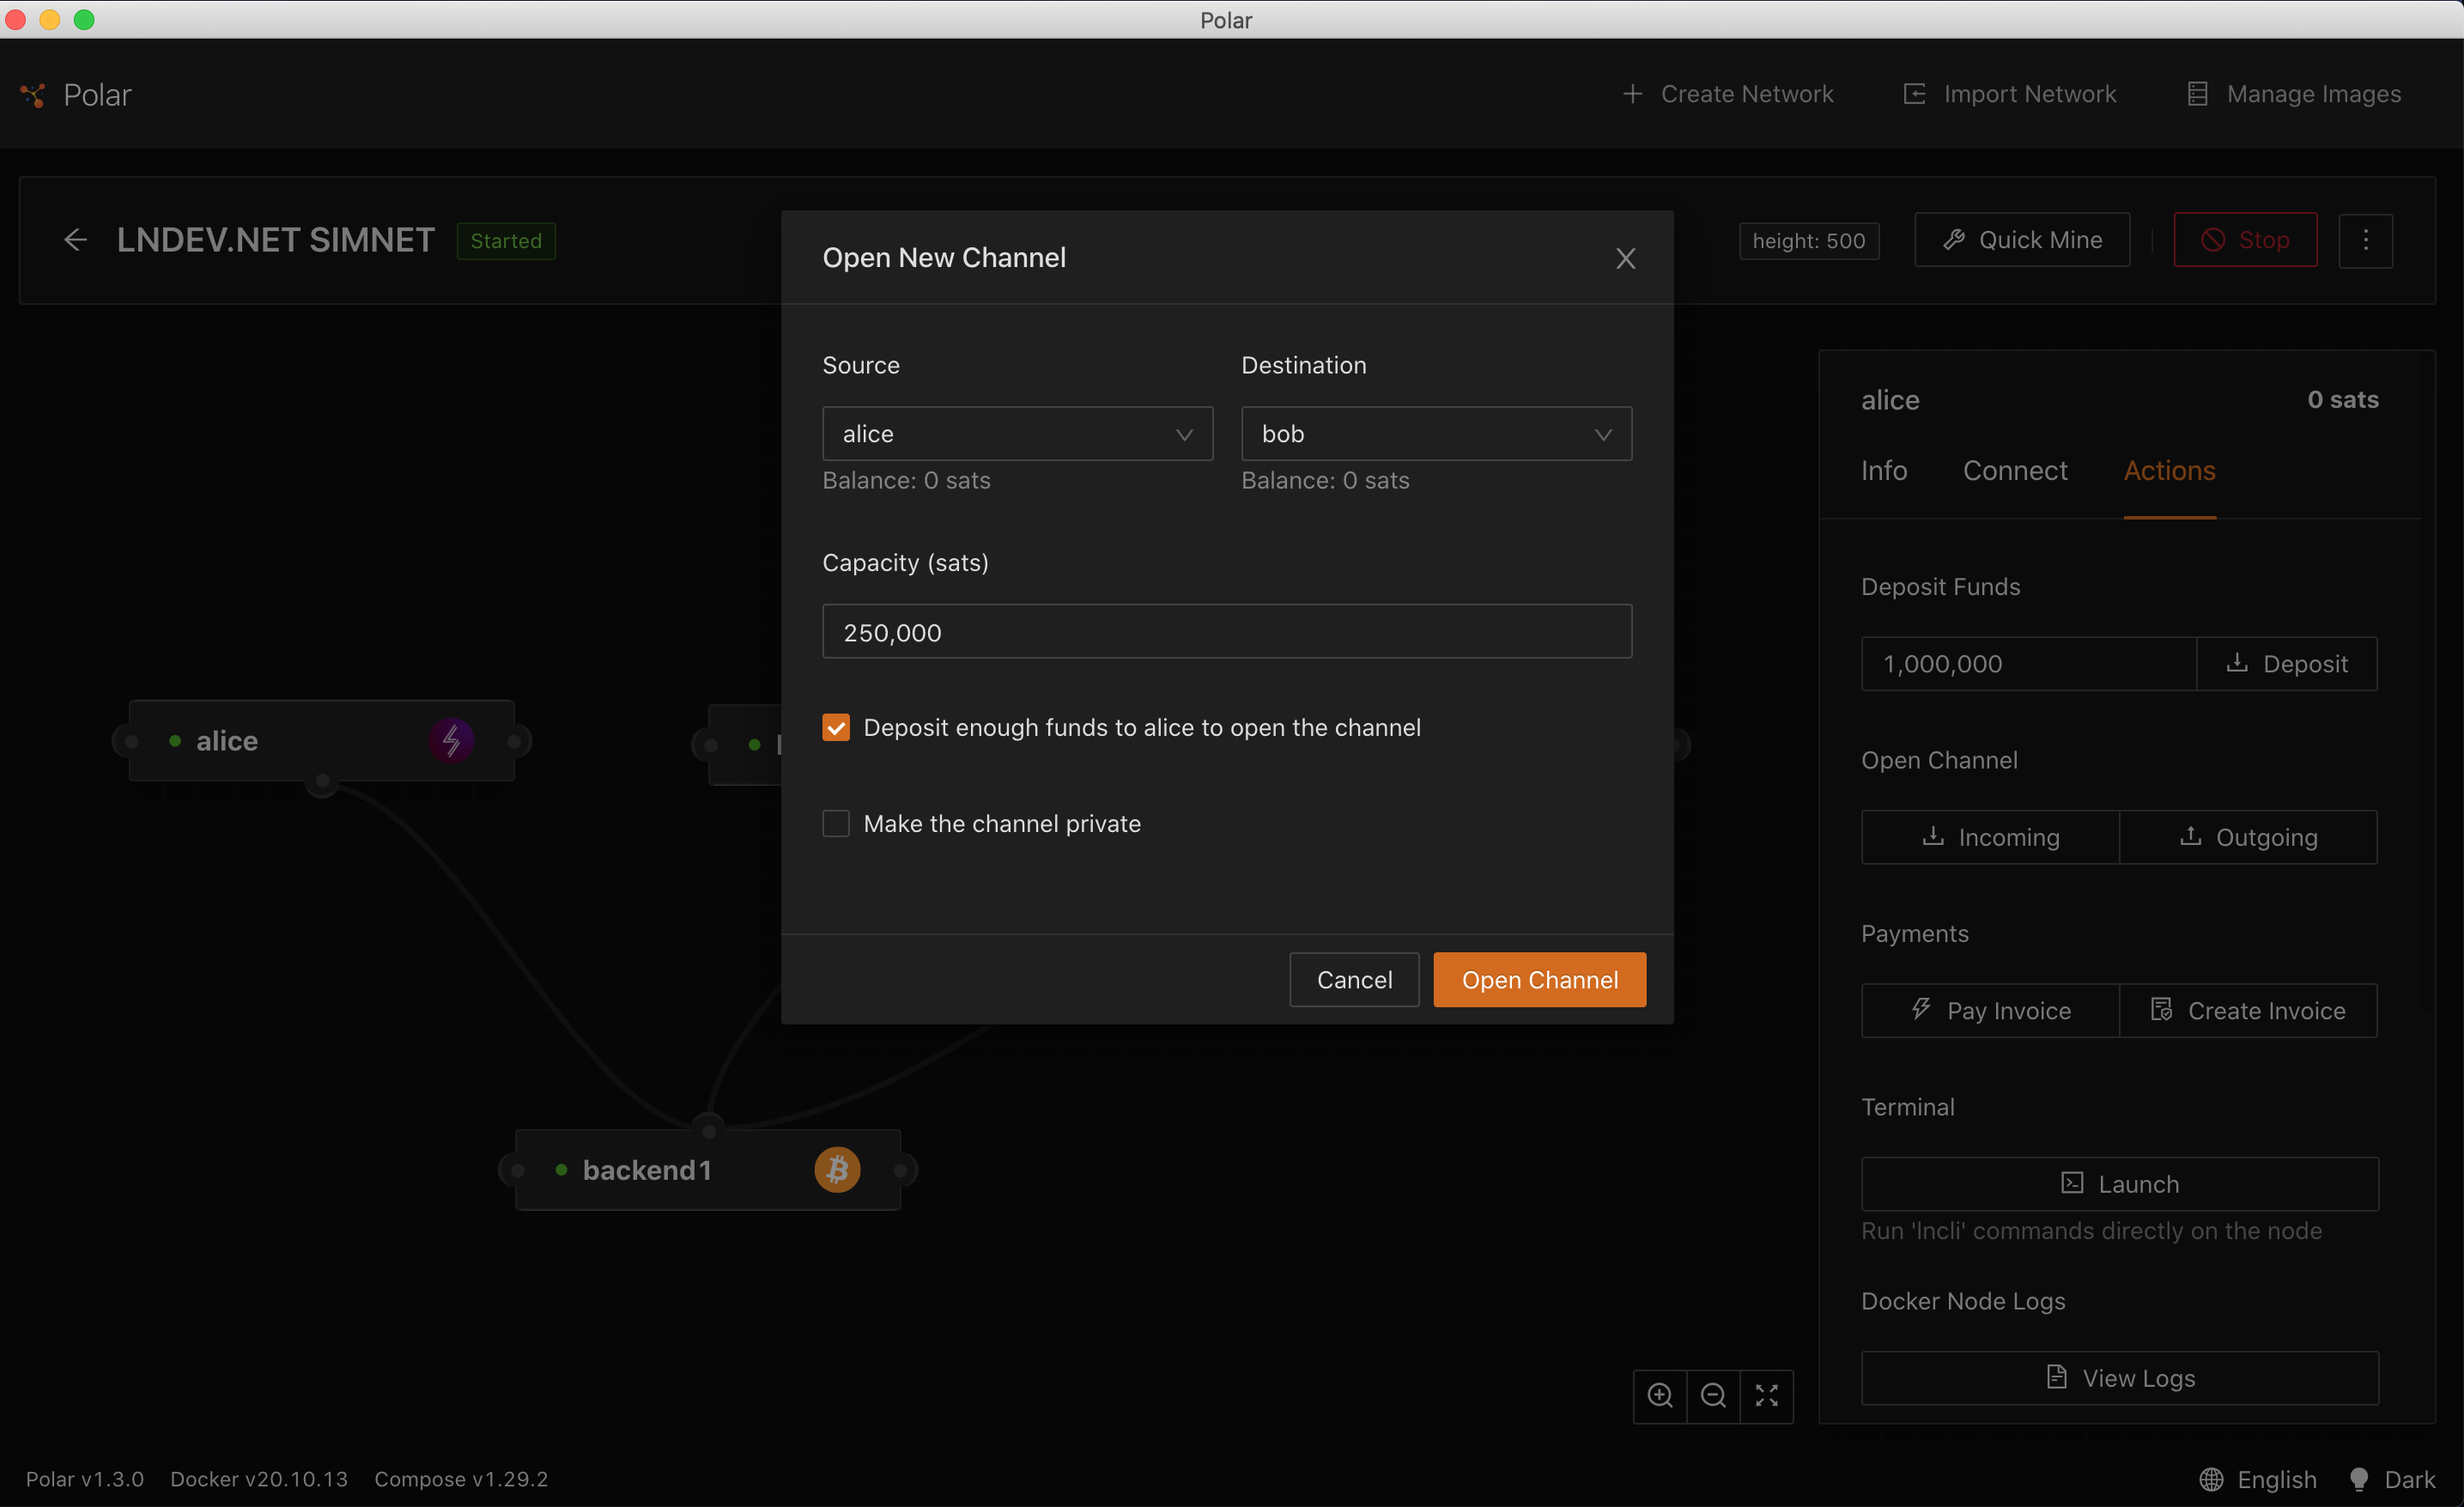
Next, we want to open a channel. We’ll select the node alice, switch to the Actions tab, and open an outgoing channel with the node bob. Now we should have a channel between alice and bob with alice owning the balance. Next, we can go ahead and create and pay an invoice.
Creating and paying an invoice #
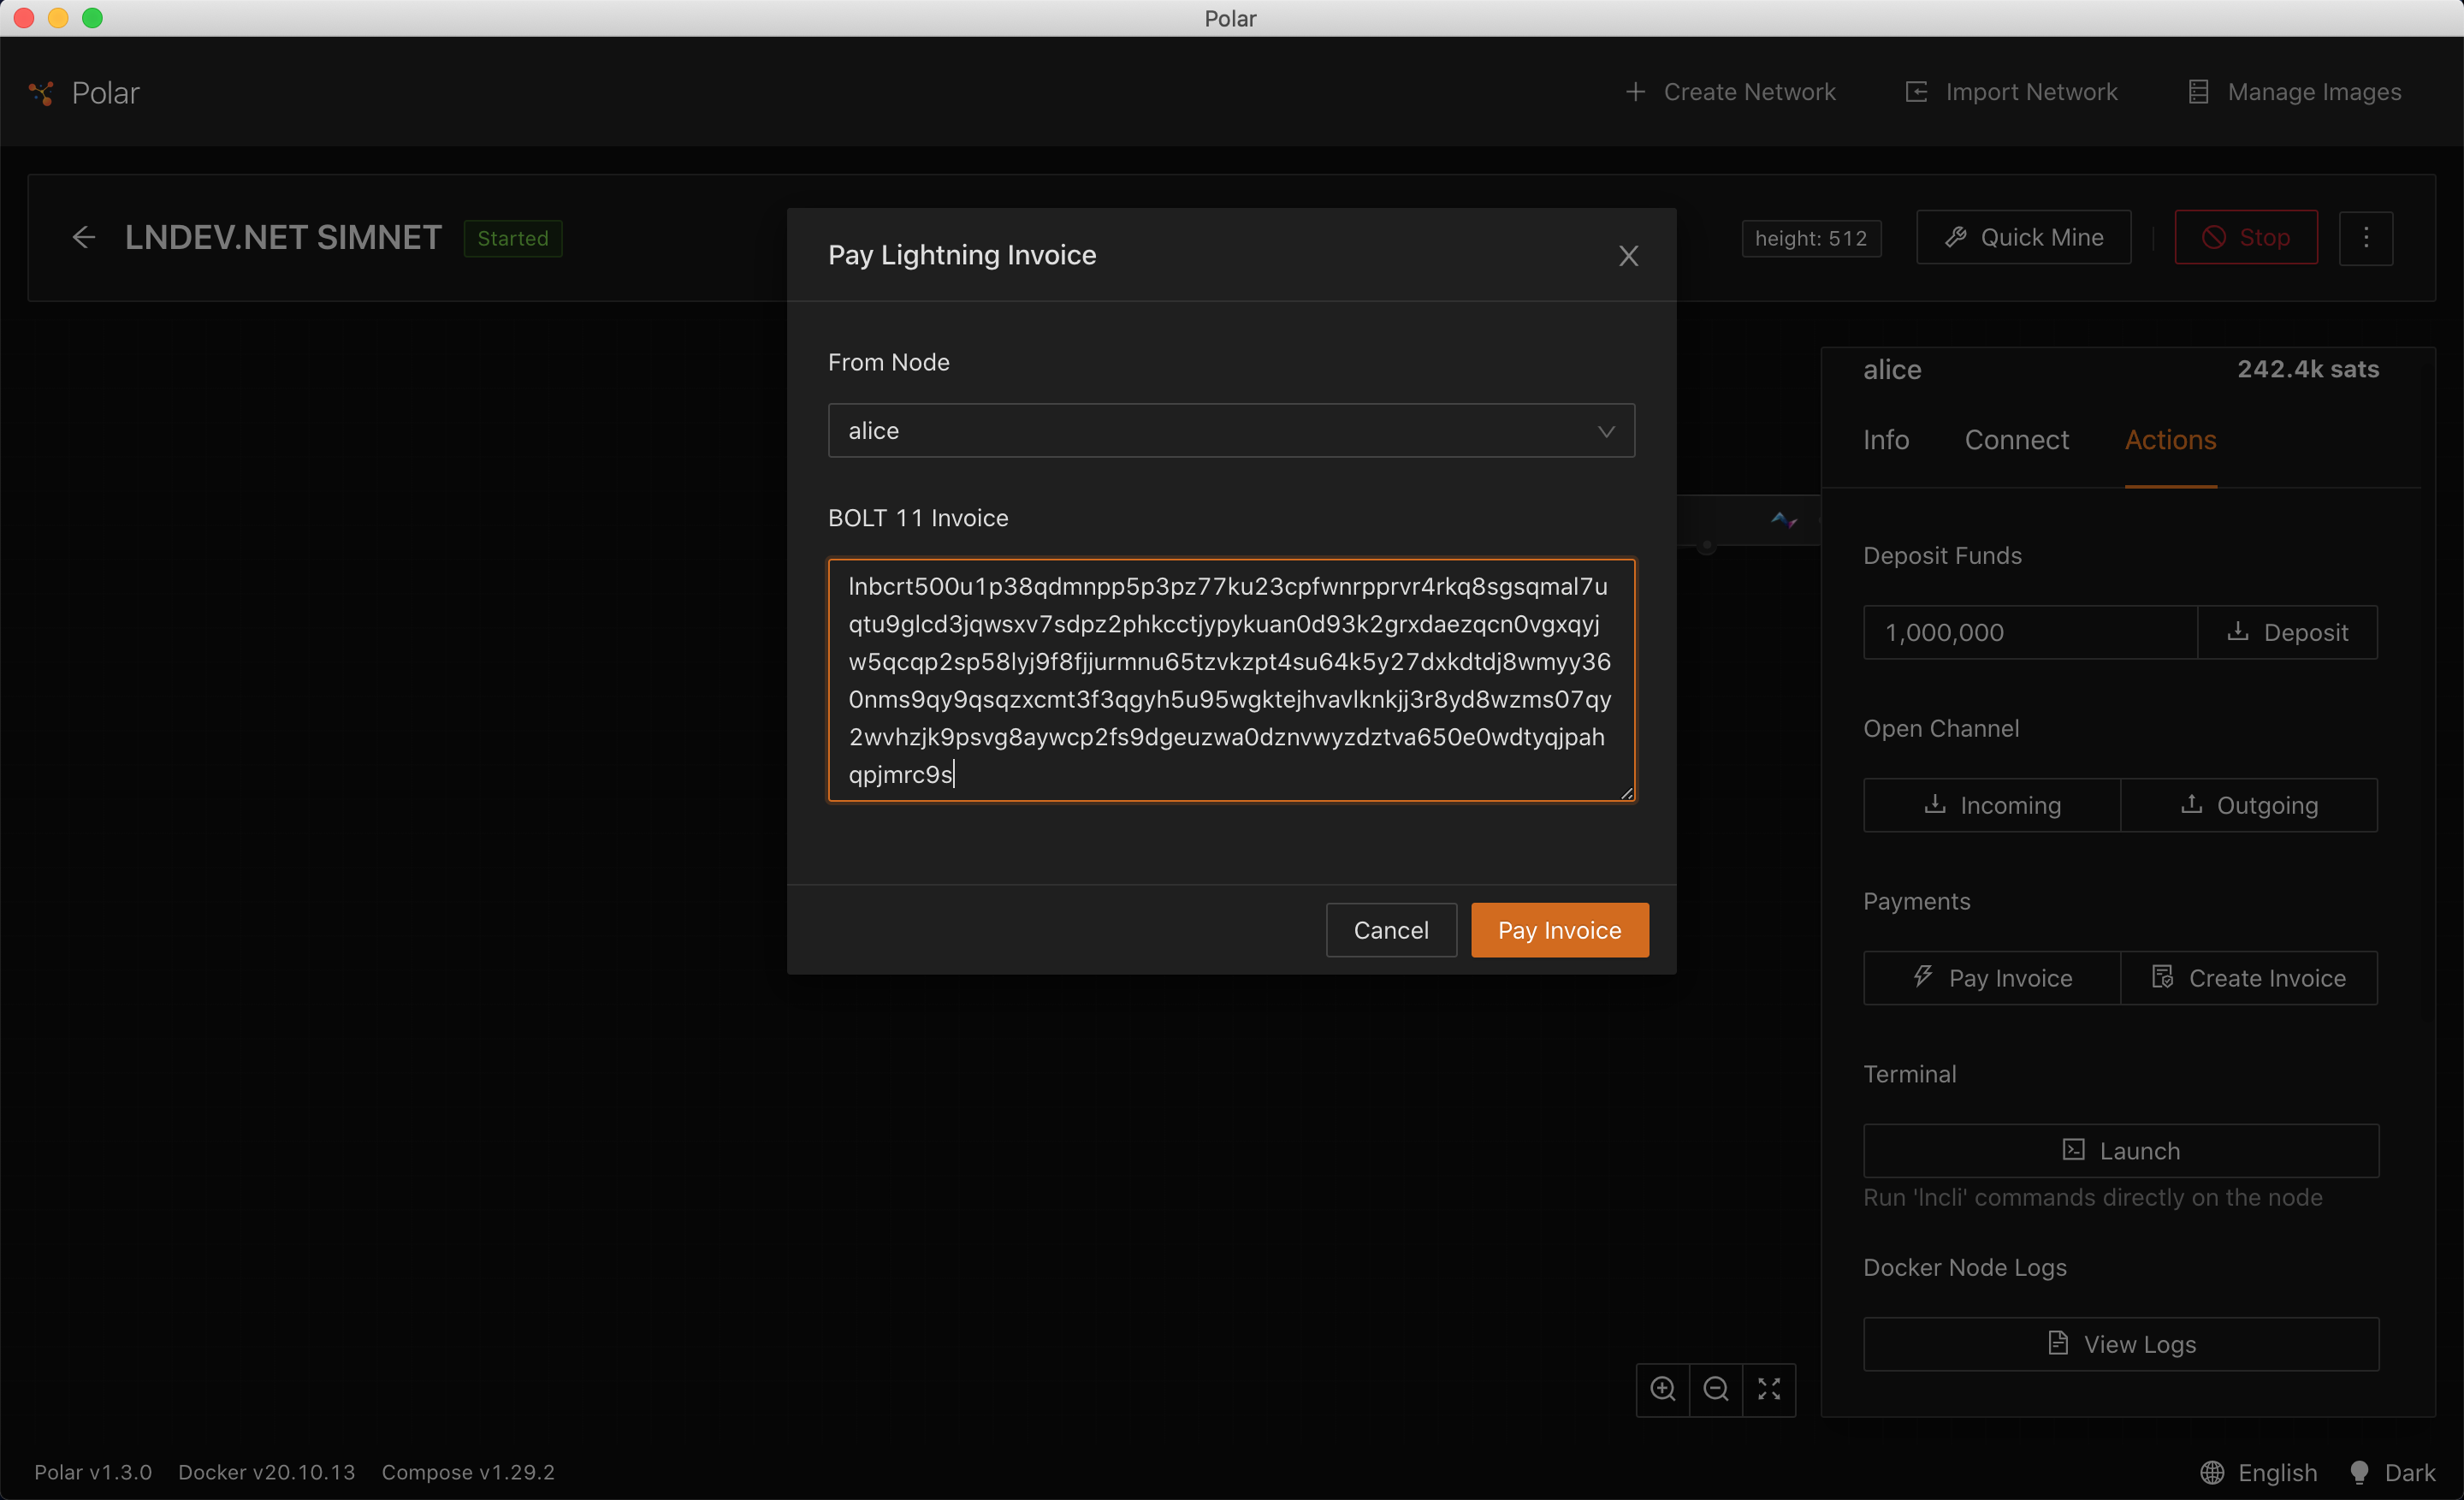
Let’s go to the node bob and create an invoice so we can move some satoshis from alice to bob. After creating the invoice, we can copy the BOLT11-encoded invoice lnbcrt500....
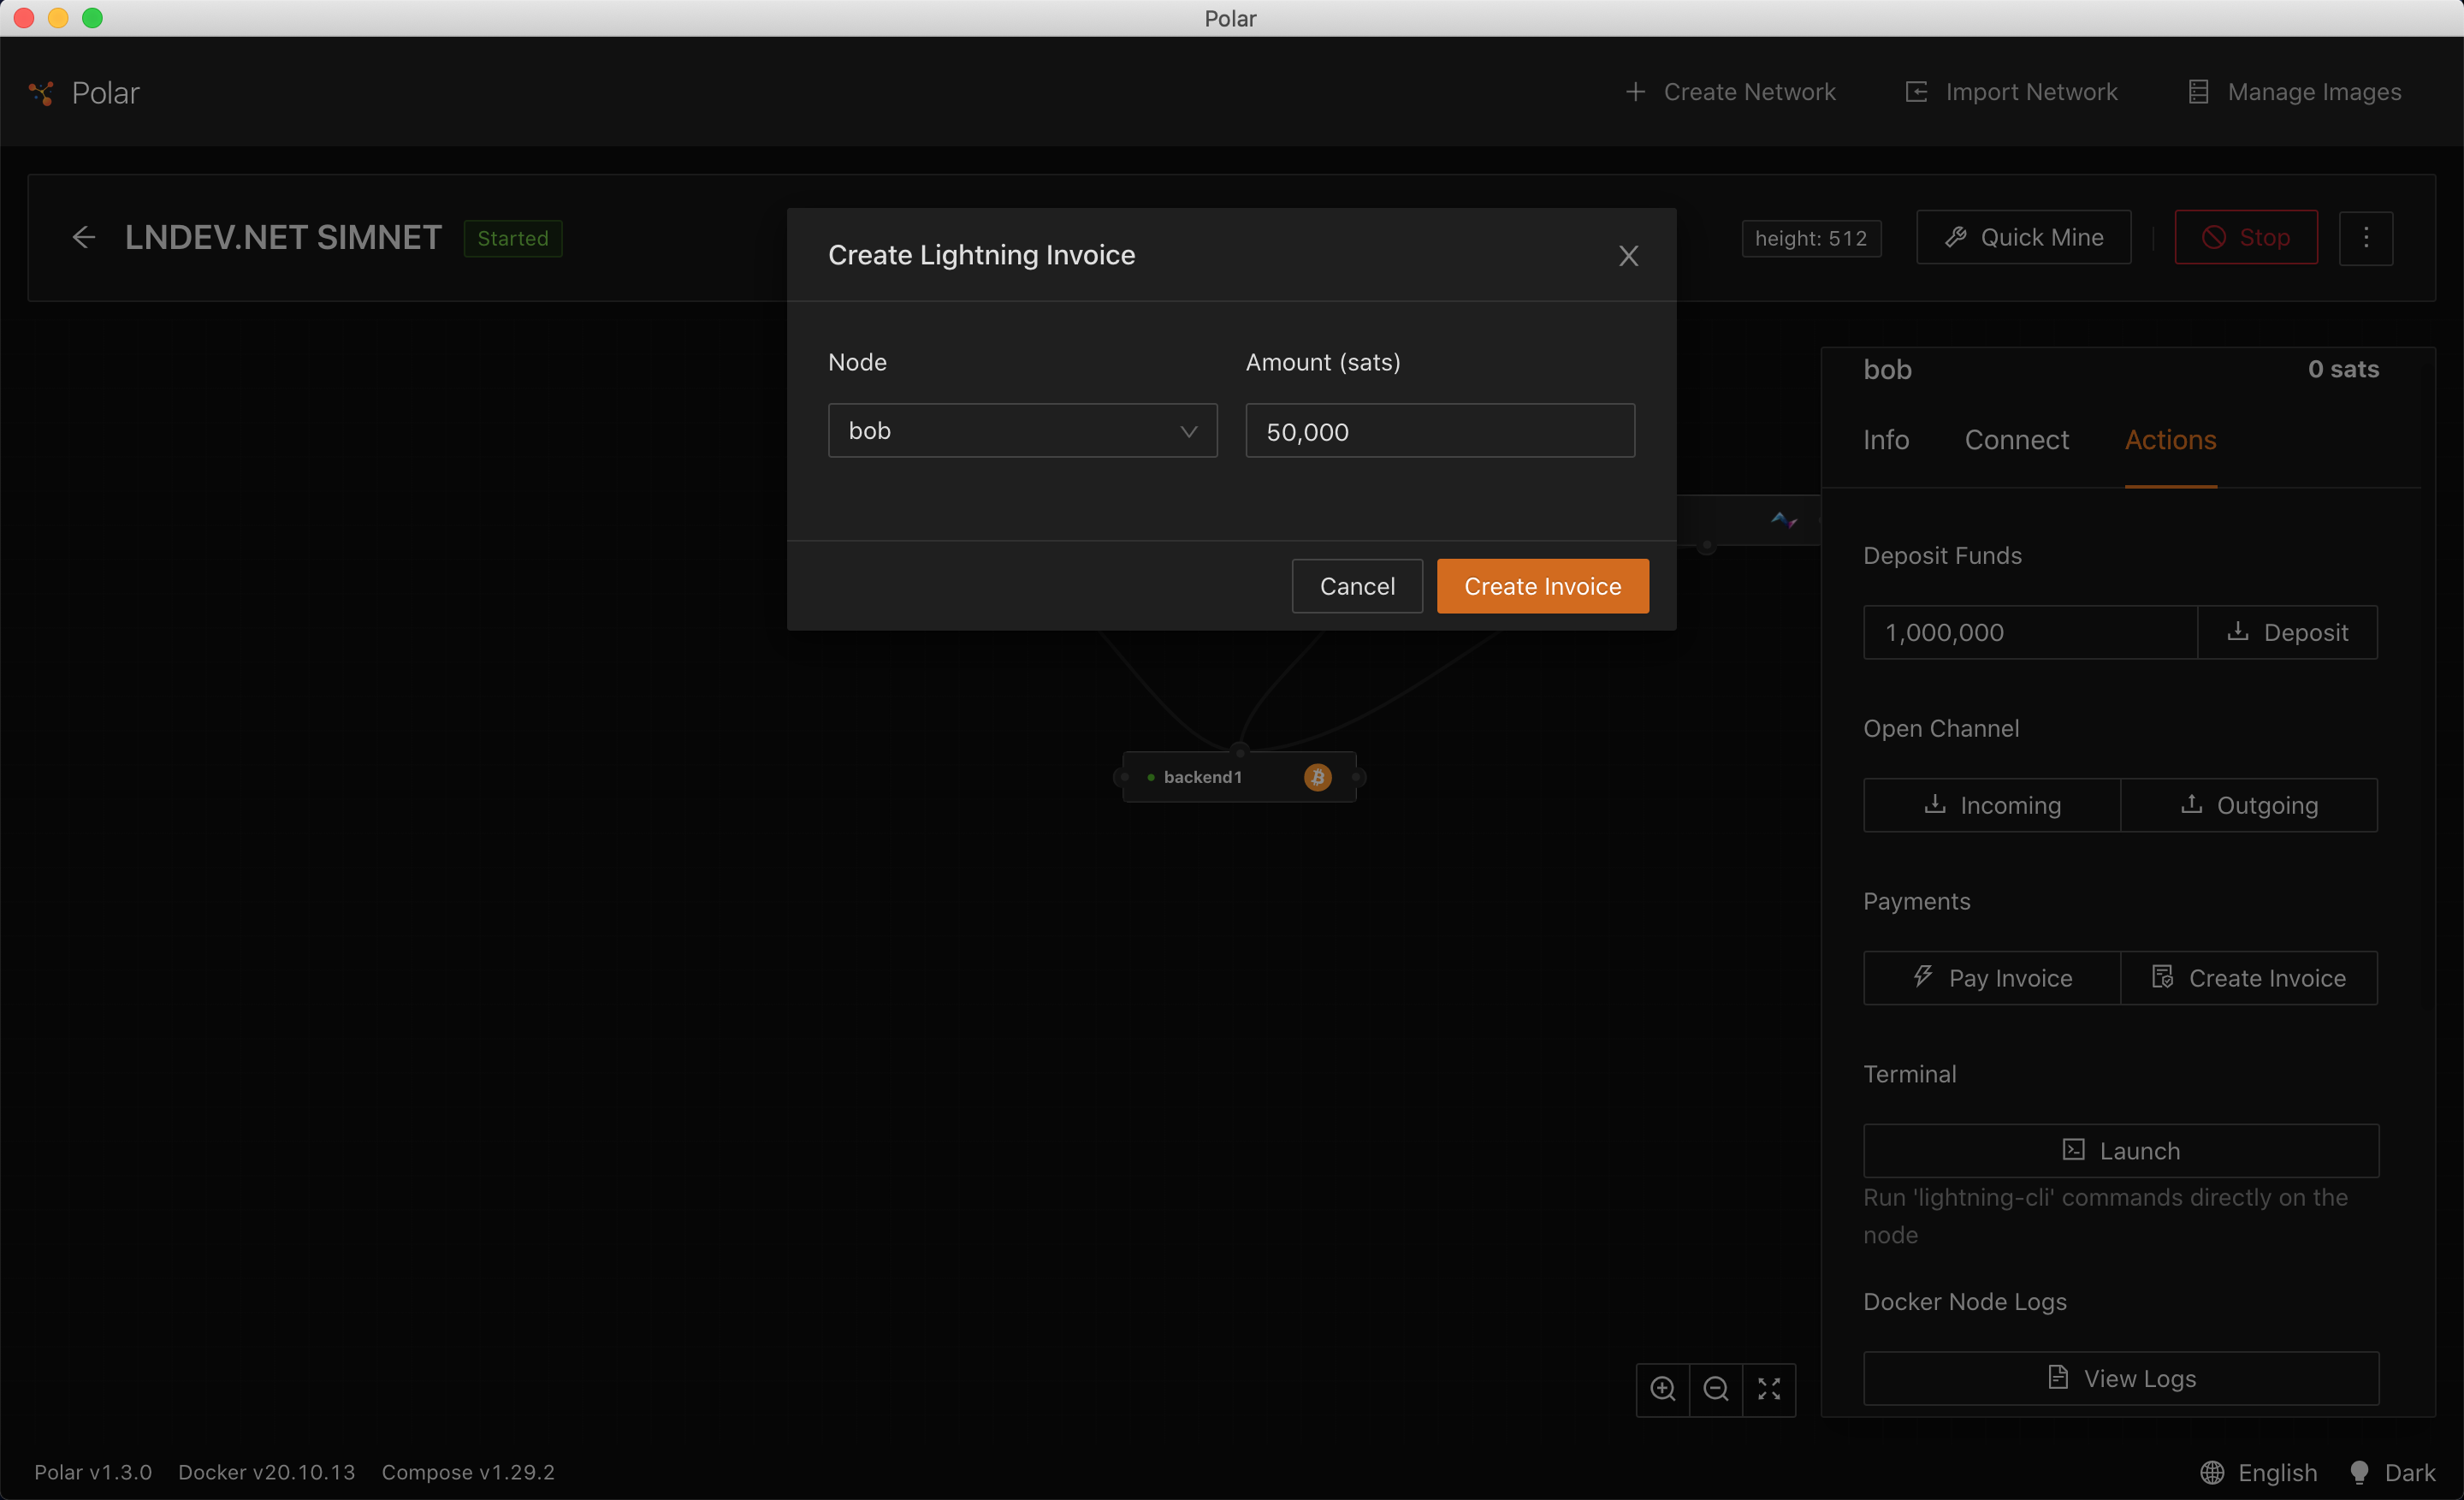
Next we’ll head over to the node alice and pay the invoice. And voilá, we have set set up our first network, created a channel and moved some sats between nodes.
Working with the local network #
Polar makes it super easy to interact with your lightning nodes. You can spin up a terminal and access the nodes command line interface, and you can easily access the logs directly from Polar. Clicking on the Connect tab on a node, will reveal the IP address in the local network, and the ports for REST and GRPC interfaces. We can confirm the information with the docker cli by running the following command:
$ docker network 1_default inspect
This shows the list of containers in the network. We can now see the detailed information of one container (e.g. polar-n1-alice), including the port mappings, by running the following command:
$ docker container inspect polar-n1-alice
Wrapping up #
We have now created our first lightning simulation network and are ready to start developing applications on Lightning. Next, we’ll set up a web application in a docker container and connect to one of our lightning nodes. Stay tuned!