Connecting A Node Application To A Lightning Lnd Node
Connecting a Node Application to a Lightning LND Node #
In the last article, I wrote about setting up a lightning simulation network with Polar. Next, we are going to set up a web application and connect it to one of our lightning nodes. Afterward, we will be able to interact with the node through the gRPC interface.
Setting up a Node application with Docker #
First, let’s set up our node web application in a docker container. Create a Dockerfile in our project directory and add the following lines to set up our container with the node-alpine base image:
FROM node:17-alpine
WORKDIR /usr/src/app

RUN mkdir -p /usr/src/app && chown node.node /usr/src/app

USER node

COPY package.json yarn.lock ./
RUN yarn

ADD ./ ./
Next, we’ll create a docker-compose.yml file, so we can use docker-compose to start our container conveniently:
version: "2"
services:
  dev:
    command: yarn run dev
    build: .
    ports:
      - "8080:8080"
    volumes:
      - ./:/usr/src/app
    environment:
      NODE_ENV: development
      PORT: 8080
      LOG_LEVEL: debug
Now, run yarn init to initialize the package.json file, followed by yarn add express to add the express package. I am using typescript and nodemon in my setup and recommend following this article to learn how to set that up. The important part is to have a dev script in the package.json file, otherwise you’ll have to adjust the docker-compose.yml file accordingly.
In our project directory, let’s create an src directory and an index.ts file:
$ mkdir src && touch ./src/index.ts
The index.ts file is the entry point to our application. Let’s set up our express server to send a basic Hello World message on the / route:
import express from "express";

const app = express();
const PORT = process.env.PORT || 3000;

app.get("/", (req, res) => {
   res.send("Hello World");
});

app.listen(PORT, () => {
    console.log(`Server listening at http://localhost:${PORT}`);
});
We can build and start our container with the following command…
$ docker-compose build dev && docker-compose up dev
… and test if it works by navigating to 127.0.0.1:8080 in our browser. Now our web app is running, and we can start connecting to our lightning node.
Adding credentials to our web application #
Now we’ll get started with connecting the web application with our lightning node. Make sure your Polar simulation network is up and running before you continue. If you haven’t set up Polar yet, see my previous article on how to set it up.
We need some to collect the connection information for our LND node. Let’s go to our alice node in Polar and retrieve the following information from the Connect tab. Please note that the Admin Macaroon provides full access to the LND node, so do not use this in a production setting unless you know what you are doing.
    TLS Cert: <base64>
    Admin Macaroon: <base64>
    GRPC Host: <IP Address + Port>
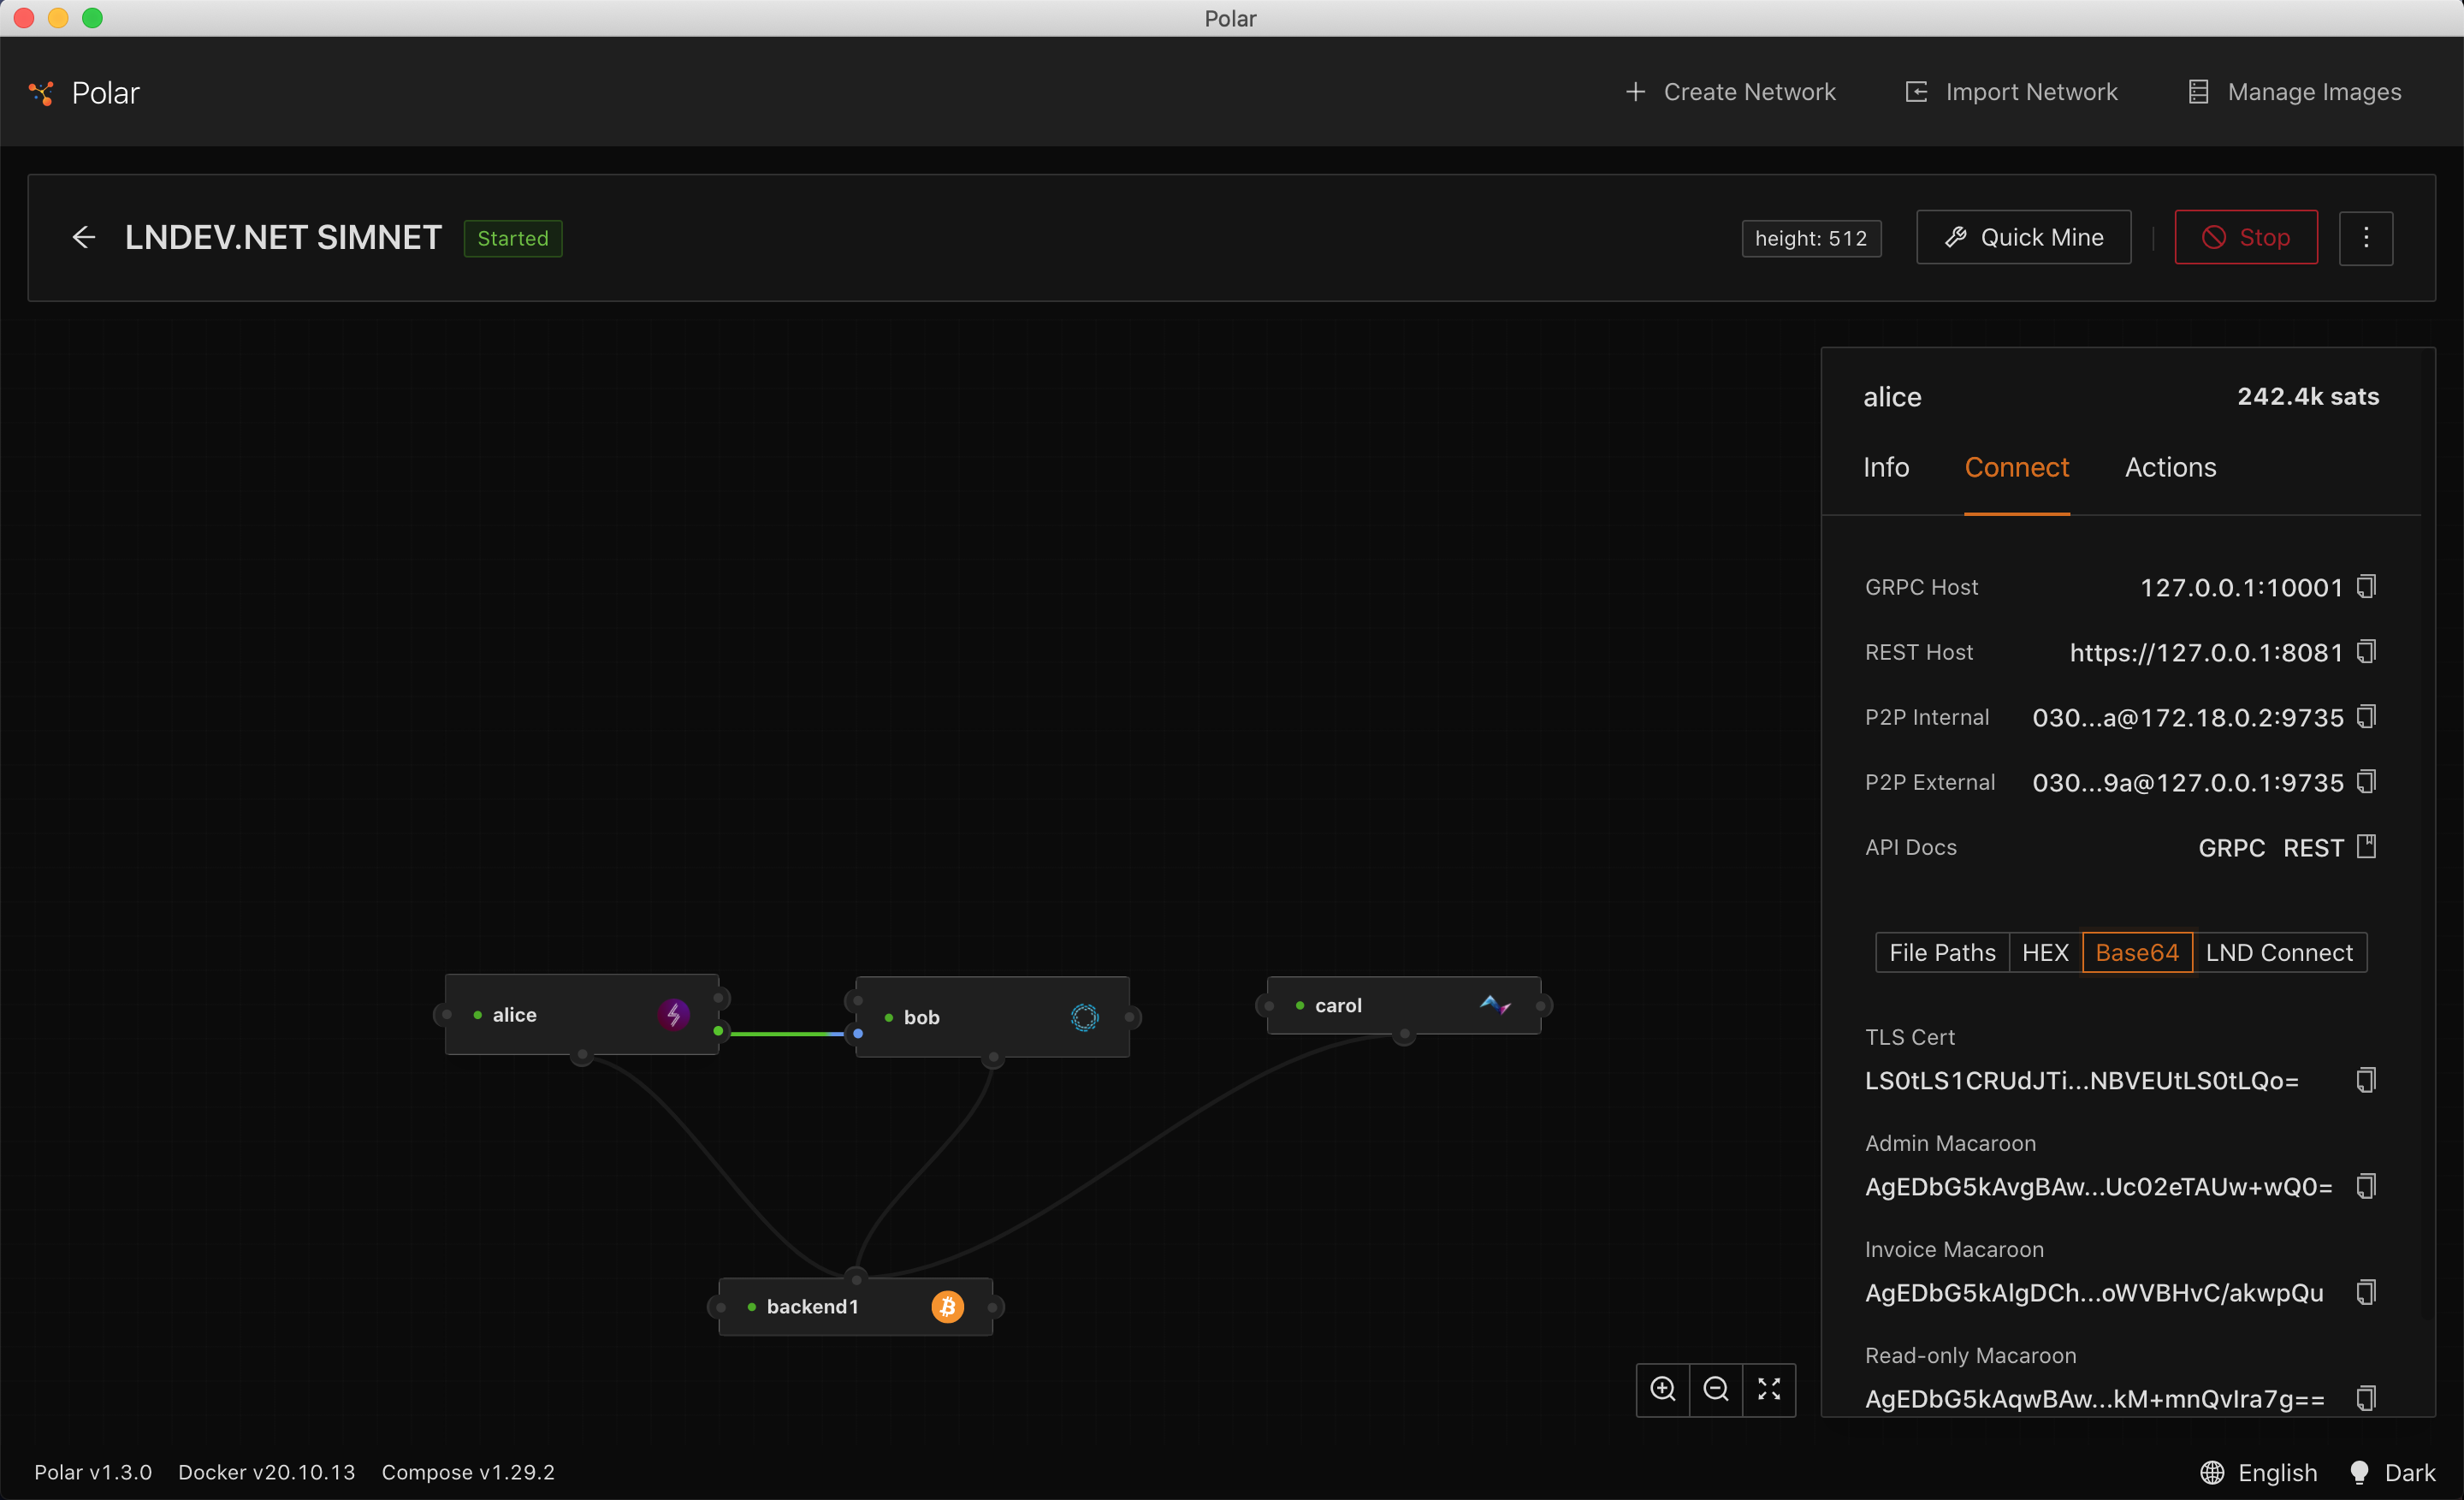
You’ll notice that the GRPC Host in Polar is 127.0.0.1:10001, but we want to connect to the LND container from another container in the network, so we can’t use localhost. Polar adds a port mapping to the container 0.0.0.0:10001->10009/tcp. You can get this information by running either $ docker ps or $ docker inspect polar-n1-alice. So instead of using 127.0.0.1:10001, we’ll have to use the local network IP with the corresponding port, e.g. 172.18.0.3:10009.
Let’s add this information to the environment variables in our docker-compose.yml file. We also want to add our web application’s container to the network with the lightning nodes’ docker containers. So let’s go ahead and do that:
services:
    dev:
        environment:
        LND_GRPC_HOST: "172.18.0.3:10009"
        LND_TLS_CERT: "LS0tLS1CRUdJTiBDRVJ..."
        LND_MACAROON: "AgEDbG5kAvgBAwoQFi..."
networks:
    default:
        external:
            name: 1_default
We now have to restart our docker container. We can then confirm if the container was added to the network:
$ docker-compose stop dev && docker-compose -d up dev
$ docker network inspect 1_default
Connecting to the LND node #
Next, we want to add two packages to our repository, that will provide us with a gRPC interface for our LND node:
$ yarn add lightning ln-service
Now, we are ready to create write the code for our LND client. First, let’s create a new lnd directory inside a utils folder add a config.ts file and a index.ts file:
$ mkdir -p ./src/utils/lnd && touch ./src/utils/lnd/config.ts && touch ./src/utils/lnd/config.ts
In the config.ts file, we’ll add the connection information that we have added to our environment variables:
export const LND_CONFIG = {
    socket: process.env.LND_GRPC_HOST,
    cert: process.env.LND_TLS_CERT,
    macaroon: process.env.LND_MACAROON
}
In our index.ts file, we will export an instance of AuthenticatedLndGrpc. The lnd instance will be passed to all of our ln-service calls.
import { authenticatedLndGrpc } from "lightning";
import { LND_CONFIG } from "./config";

const { lnd } = authenticatedLndGrpc(LND_CONFIG);

export default lnd;
Now we are ready to test our connection, so let’s update the code in our index.ts file:
import express from "express";
import lnd from "./utils/lnd";
const lnService = require("ln-service");

const app = express();
const PORT = process.env.PORT || 3000;

app.get("/", async (req, res) => {
    try {
        const info = await lnService.getWalletInfo({ lnd });
        res.send(info);
    } catch(e) {
        res.send(e);
    }
});

app.listen(PORT, () => {
    console.log(`Server listening at http://localhost:${PORT}`);
});
Wrapping up #
If we navigate to 127.0.0.1:8080 in our browser, we should now be able to see the lightning node’s response. Great! We are ready to interact with our node and start doing some cool things. In the next articles, I want to explore some of these methods, to create channels and send payments. In the meantime you can head over to github.com/alexbosworth/ln-service to get an overview of the methods available.
